So not only did this project helped me know more about tcp transmission
and also helped my old scripts
I based on the structure and with minimum change I made a pyQT version of the camera app

So not only did this project helped me know more about tcp transmission
and also helped my old scripts
I based on the structure and with minimum change I made a pyQT version of the camera app
I would start first with the easy part, Flask
Flask is a micro framework to set up at server, app
and without setup like the whole Django file structure framework.
The good part is the variable they use is quite similar, because template of jinja2 and django is very similar
the code: https://github.com/soarwing52/Remote-Realsense/blob/master/flask_server.py 繼續閱讀 “Raspberry Pi + Realsense: Flask server"
So, after the “mind blowing" fair we went in Stuttgart, we started to push something new
The thing is what I’ve been saying for a long time: Raspberry Pi 4
As currently the adapter is not here yet, I tried to start without it connecting to hdmi directly
I did some research and found a lot of methods, wireless method hasn’t succeed
So, what I did on my first day of Raspberry Pi
though the distributor has put a NOOB in the SD card which came with the pi, I decided to try from step one on another SD card
So go download Raspbian at https://www.raspberrypi.org/downloads/raspbian/
I use the one with recommended software, for more conveniency

and I saw either people use Rufus or Etcher to install, I used Rufus while I was installing Ubuntu, so I tried Etcher this time.
It is quite intuitive, just get the .zip I just downloaded, and then it will almost autmoatically find the SD card available for install, then just flash it!

After flashing, the system is ready, if there is a micro-HDMI to HDMI adapter, it can be straight connected to screen, mouse, and keyboard.
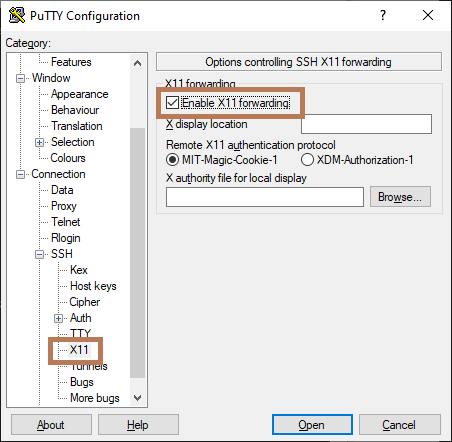
So two softwares are required for this step: PUTTY and Xming
in the SD card first create a new file called ssh without any extentions
the first step can test if it is working
connect Pi to PC with Ethernet cable, and then use call the command line
type in ipconfig /all to get all the connected port

our Pi will be at Ethernet adapter Ethernet, ip will be shown at Autoconfiguration IPv4 Address

FYI. the PCs connected to this PC will be always be in 169.254.xxx.xxx
then go back and turn off Raspberry Pi, open the cmdline.txt in the SD card
put in ip=169.254.xxx.xxx at the end of the line
then we can put the SD card back in, turn on Pi
Next step is turn on Putty, and connect with the IP address

when the window opened, log in
default is
user: pi
password: raspberry
then the terminal is here!

for GUI, type startlxde, then we have our pi on our PC!

That is my first day of Raspberry Pi, next step will let it run my realsense script!
————————————————————————————————————————-
On day two, I found that the ip address changes, which i will need to repeate the process everytime I reconnect pi.
Also connecting all the messy cables in 2019 is kind of dumb.
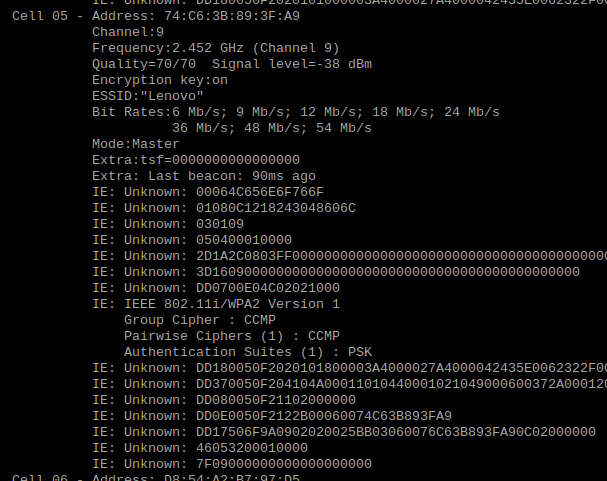
So I looked into wireless options, and followed these two:
Official document: https://www.raspberrypi.org/documentation/configuration/wireless/wireless-cli.md
And a tutorial
Before connecting to wifi, the thing is that the terminal don’t like underscore(_) and space
My wifi name is FRITZ!Box 7490, therefore it can’t be used, so I created a hotspot from my PC

And then follow the instructions
first use sudo raspi-config to connect to hot spot

then get the sudo iwlist wlan0 scan
This is to check if the connection is valid
Then in the official document is kind of hard coding it
with sudo nano /etc/wpa_supplicant/wpa_supplicant.conf will edit the .config file
or the automatic way used in the video is sudo wpa_passphrase “SSID" “password"| sudo tee -a etc/wpa_supplicant/wpa_supplicant.conf

之前完成的相機程式跟Arcmap plugin都做好之後,就正式投入使用啦
不過中間也是經過幾般波折,出去測試半天之後,還在調整
然後說想要再測試,結果直接被派了一個三天兩夜…
完全傻眼的結果,於是就在車上邊調整程式碼
然後呢,當我弄到夠自動化可以司機自己去時,我發現我沒有電腦了,因為被帶走了
於是公司又給了我一台,可是呢,果然,又是一個2014年的基本款文書機
4GB ram,HDD,唯一可以的大概就…i5 這樣
繼續閱讀 “RealSense 學習筆記/教學/分享(五):用新的相機程式碼解釋Multiproccesing"好的,錄製了深度跟色彩兩幅畫面並且把他們配對好之後呢,接下來就是主要任務了
要計算兩點的距離
如果說要介面,Python已經有十分多的選擇可以選
我最後選了matplotlib來作為工具
繼續閱讀 “RealSense 學習筆記/教學/分享(四):計算兩點實際距離"前面那篇在機器的控制端準備好了之後,接收到的資料要怎麼處理呢?
就讓我在這篇裡面介紹
主要本篇在於視覺化 用opencv為主
適用的範例是這個:
https://github.com/soarwing52/RealsensePython/blob/master/phase%201/read_bag.py

在上一篇的設定好了之後,就用可以看第一篇裡面的表格
|
poll_for_frames()
|
回傳配對好的畫面,沒有配對就回傳Null
只要加上
if not depth_frame or not color_frame:
continue
即可在Null時避免接下來的錯誤
|
|
wait_for_frames()
|
他會獲取一幀之後暫停串流,然後直到獲取下一幀
不過我使用結果之後,在深度跟RGB影像配對上出了問題
他會取上一幀跟下一幀 不過我每幀都隔10秒不能用
|
|
try_wait_for_frames
|
這個應該就是在wait_for_frames上面再多加一個等待的秒數
沒有實測過
|
|
timestamp
|
Frame number
|
Fream number
|
timestamp
|
|
402204.595
|
Depth243
|
Color 274
|
402204.221
|
|
403104.714
|
Depth 270
|
Color 301
|
403104.941
|
|
404171.521
|
Depth 302
|
Color306
|
403271.741
|
|
406038.434
|
Depth359
|
Color333
|
404172.461
|
|
407305.267
|
Depth 397
|
Color 389
|
406040.621
|
|
407338.605
|
Depth398
|
Color 427
|
407308.301
|
|
408038.697
|
Depth419
|
Color 449
|
408042.221
|
|
409238.855
|
Depth 455
|
Color 485
|
409243.181
|
|
409938.947
|
Depth476
|
Color 506
|
409943.741
|
|
410705.715
|
Depth 499
|
Color 529
|
410711.021
|


https://github.com/IntelRealSense/librealsense/blob/master/doc/post-processing-filters.md
dec = rs.decimation_filter(1)
to_dasparity = rs.disparity_transform(True)
dasparity_to = rs.disparity_transform(False)
spat = rs.spatial_filter()
spat.set_option(RS2_OPTION_HOLES_FILL, 5)
hole = rs.hole_filling_filter(2)
temp = rs.temporal_filter()

depth = dec.process(depth_frame)
depth_dis = to_dasparity.process(depth)
depth_spat = spat.process(depth_dis)
depth_temp = temp.process(depth_spat)
depth_hole = hole.process(depth_temp)
depth_final = dasparity_to.process(depth_hole)
接下來我的程式碼裡面就是一些幀的資料
var = rs.frame.get_frame_number(color_frame)
print ‘frame number: ‘+ str(var)
time_stamp = rs.frame.get_timestamp(color_frame)
time = datetime.now()
print ‘timestamp: ‘ + str(time_stamp)
domain = rs.frame.get_frame_timestamp_domain(color_frame)
print domain
meta = rs.frame.get_data(color_frame)
print ‘metadata: ‘ + str(meta)


from matplotlib import pyplot as plt
plt.imshow(img)
plt.show()
有些人問我 明明工作看起來也不錯 薪水 環境都不錯 為什麼我還在找?
先看看以下影片
這是去年的發表,當辦公室仍在用2000或是更久以前的方法 花許多時間/人力/眼力的同時
這樣的算法已經準備隨時取代掉這些工作了
你說我會不會怕? 當然會,所以要找能夠更未來性的工作 而不是在這樣養老的小鎮 已暫時的安穩而滿足,必須更向前啊!
So, after the hello world, more controls over the device.
And the function of pipeline_profile I haven’t know yet
in this part I will put in the controls before wait_for_frames,
|
enable_stream
|
Define the stream type and also width/height…
|
|
enable_all_streams
|
Turn on all streams at once
|
|
enable_device
|
Input “serial”
|
|
enable_device_from_file
|
(“filename”,True/False) for repeat_playback or not, either once to the end, or keep looping
|
|
enable_record_to_file
|
(“filename.bag”)
|
|
disable_stream
|
(“stream”,”index”)
|
|
disable_all_streams
|
|
|
resolve
|
|
|
can_resolve
|
config.enable_stream(rs.stream.depth, 640, 360, rs.format.z16, 30)
config.enable_stream(rs.stream.color, 640, 480, rs.format.bgr8, 30)
The options can be found in the Intel Realsense Viewer, color,depth,infrared, resolution, mode, fps.
and the rest is more related when multiple devices were used
config.enable_record_to_file(file_name)
config.enable_from_device(filename)
depth_sensor = device.first_depth_sensor()
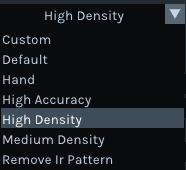
depth_sensor.set_option(rs.option.visual_preset, 4)
dev_range = depth_sensor.get_option_range(rs.option.visual_preset)
preset_name = depth_sensor.get_option_value_description(rs.option.visual_preset, 4)
https://github.com/IntelRealSense/librealsense/wiki/D400-Series-Visual-Presets#related-discussion
This part is setting the preset as in the Realsense Viewer, and in my need is the preset 4, high density.
The dorodnic of intel he wrote on loop to loop through the presets.
which he mentioned the preset numbers are changing all the time, I suppose its among other devices, at least in this same machine it stays
recorder = device.as_recorder()
pause = rs.recorder.pause(recorder)
playback = device.as_playback()
playback.set_real_time(False)
playback.pause()
playback.resume()
Recorder will start recording when in the configuration set,with function or .pause() and .resume()
And the next is playback
This is playing the recorded bag file
|
pause
|
Pause and resume, while resume it always turn really slow and lag, until it catch up with the frames
|
|
resume
|
|
|
file_name
|
I haven’t use these functions
|
|
get_position
|
|
|
get_duration
|
|
|
is_real_time
|
Set to the real time behavior as recorded time
|
|
set_real_time
|
Usually I set to set_real_time(False) so I can go through each frame to measure, or else the pipeline will keep the frames looping as real time behavior when its (True)
|
|
config.enable_record_to_file(file_name)
|
So I suppose it can open one bag and record this playback to a new file, while
rs.config.enable_device_from_file(config, ‘123.bag’)
Does Not enable the same time
config.enable_record_to_file(file_name)
|
|
current_status
|
depth_stream = profile.get_stream(rs.stream.depth)
inst = rs.video_stream_profile.intrinsics
#get intrinsics of the frames
depth_intrin = depth_frame.profile.as_video_stream_profile().intrinsics
color_intrin = color_frame.profile.as_video_stream_profile().intrinsics
depth_to_color_extrin = depth_frame.profile.get_extrinsics_to(color_frame.profile)
These are getting some data of the camera and streams, i use intrinsic to get the calibration while projecting pixels to 3D coordinations
Otherwise I have no other use for them yet, as I go through the files the usage would be more in 3D models also, while creating by scanning, the accuracy is a lot more important in smaller scales
當然 所有程式的開始都是 Hello World
這個也不例外
第一個功能,就是開啟相機,然後偵測畫面中央的深度距離相機多遠
我的成果如下:
https://github.com/soarwing52/RealsensePython/blob/master/phase%201/Hello%20World.py
—————————————————————-
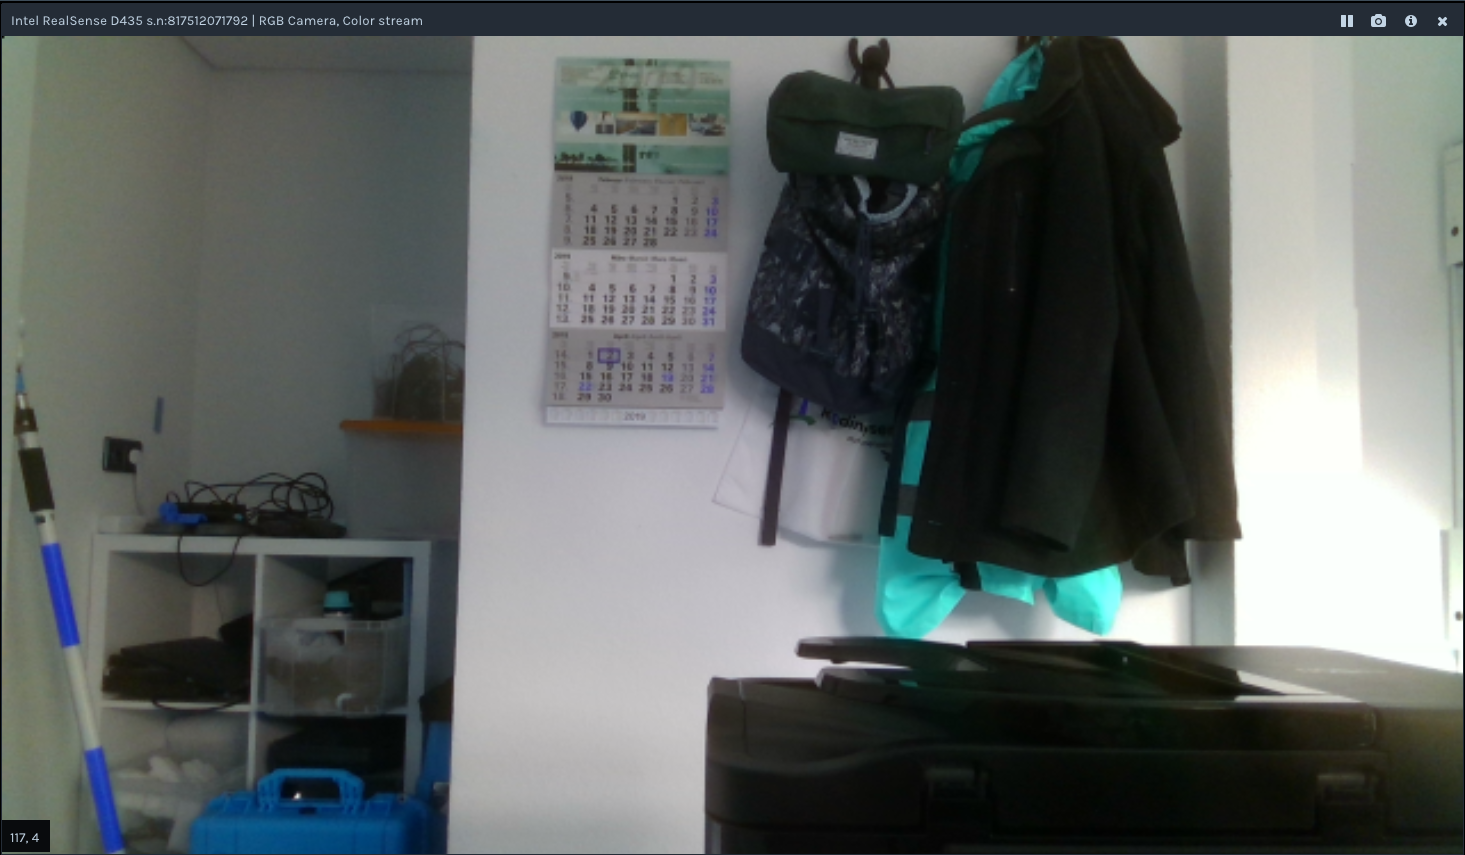
因為工作的關係,老闆決定買了Intel D435的深度相機
然後就叫我做出他們未來可以測量照片裡面物體的大小
大概就是萊卡他們的產品那樣
我們公司做的是道路資料蒐集road survey
現在能看到的主要都是F200 跟一些比較舊的教學文,新一代D400 系列的比較少
所以就想來教學相長一下,希望看到這篇也能夠跟我一起交流
——————————————————————————————————
求助區
目前我卡關的有
rs.syncer
playback.seek
poll_for_frames
如果有看到的可以指導一下就拜託了!
——————————————————————————————————-
我比較了D415/D435 基本上大同小異的深度相機,不過435有比較廣的視角
所以在我們的需求上選用的他
Rolling shutte/Global shutter是另外主要的差異
不過在我們的使用上是沒有影響的
——————————————————————————————————-
首先就是基礎安裝啦
這款相機主要定位是給開發者/教學/研究用途,算是把未完成的產品拿出來賣然後由使用者開發?
不過畢竟是intel 這產品主要也是賣晶片 以供未來普及在筆電/汽車/遊戲機等
安裝完之後 打開viewer會說需要升級韌體
一樣按照連結,打開之後是個簡單的command line

先在2確定可以升級的裝置之後會到1,輸入完整連結即可
安裝完成之後裡面含有:
Intel® RealSense™ viewer:可以直接顯示RGB/深度 2D/3D影像 並且可以錄製
Depth quality tool:檢視深度影像
Debug tools:裝置的校正回報時候會用到的套件
Code samples:最一開始學習時候,就是這個Visual Studio示範開始的
Wrappers:支援C++以外的 C、Python、Node.js API、ROS、LabVIEW語言套件
打開之後開啟所有的stream 影像 可以看到紅外線IR 可見光RGB 跟深度 depth
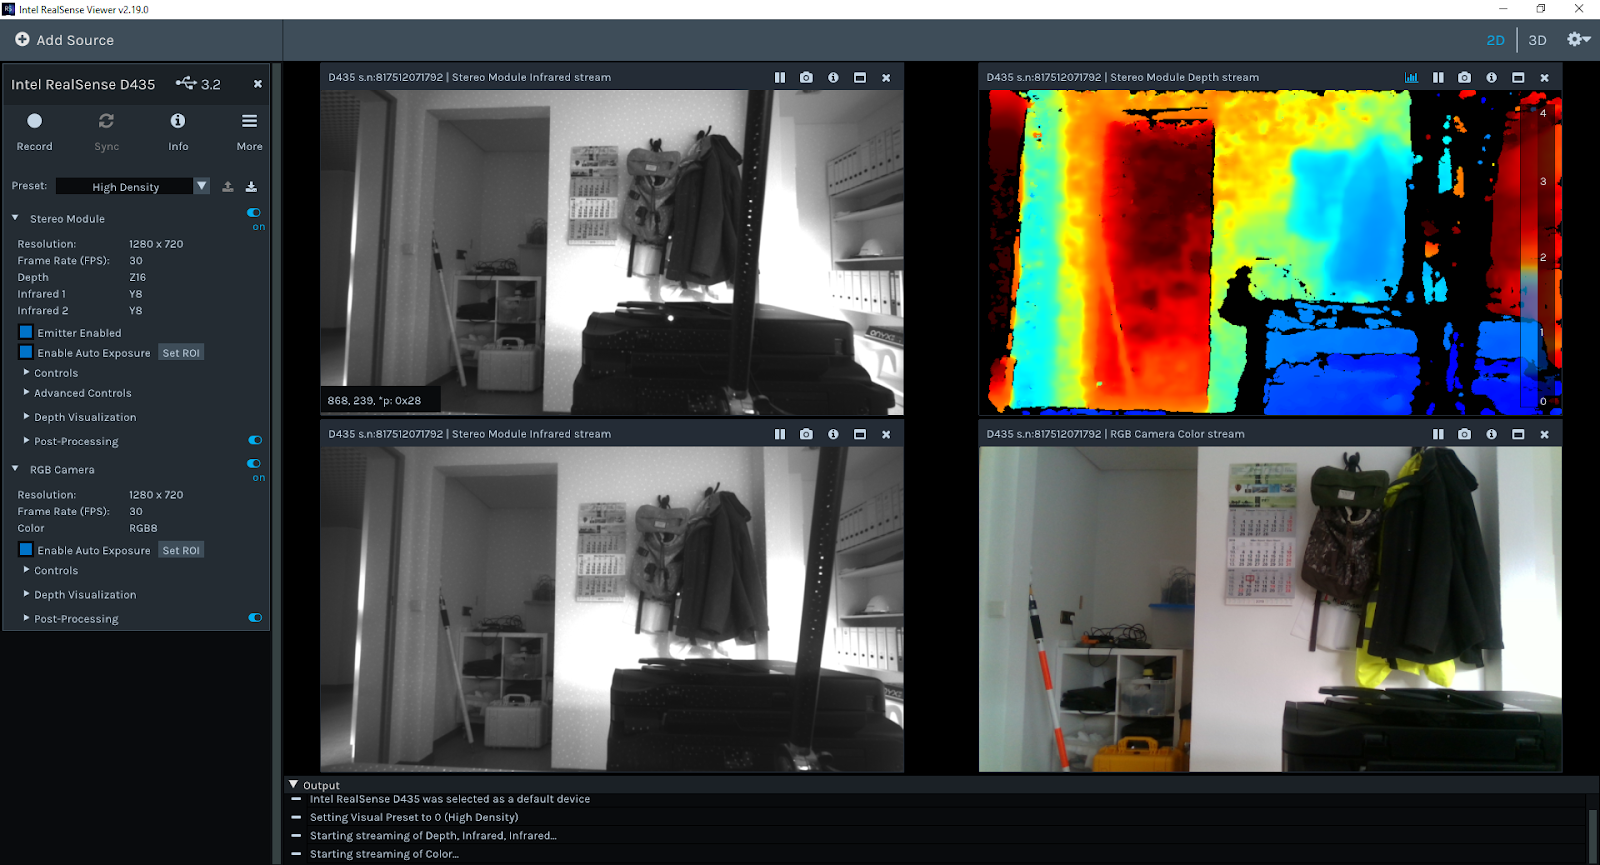
RGB相機的設定值有:

有灰階:

RGB

BGR
深度相機
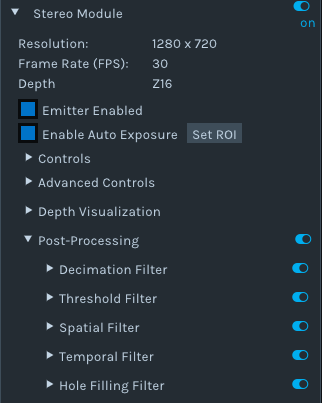
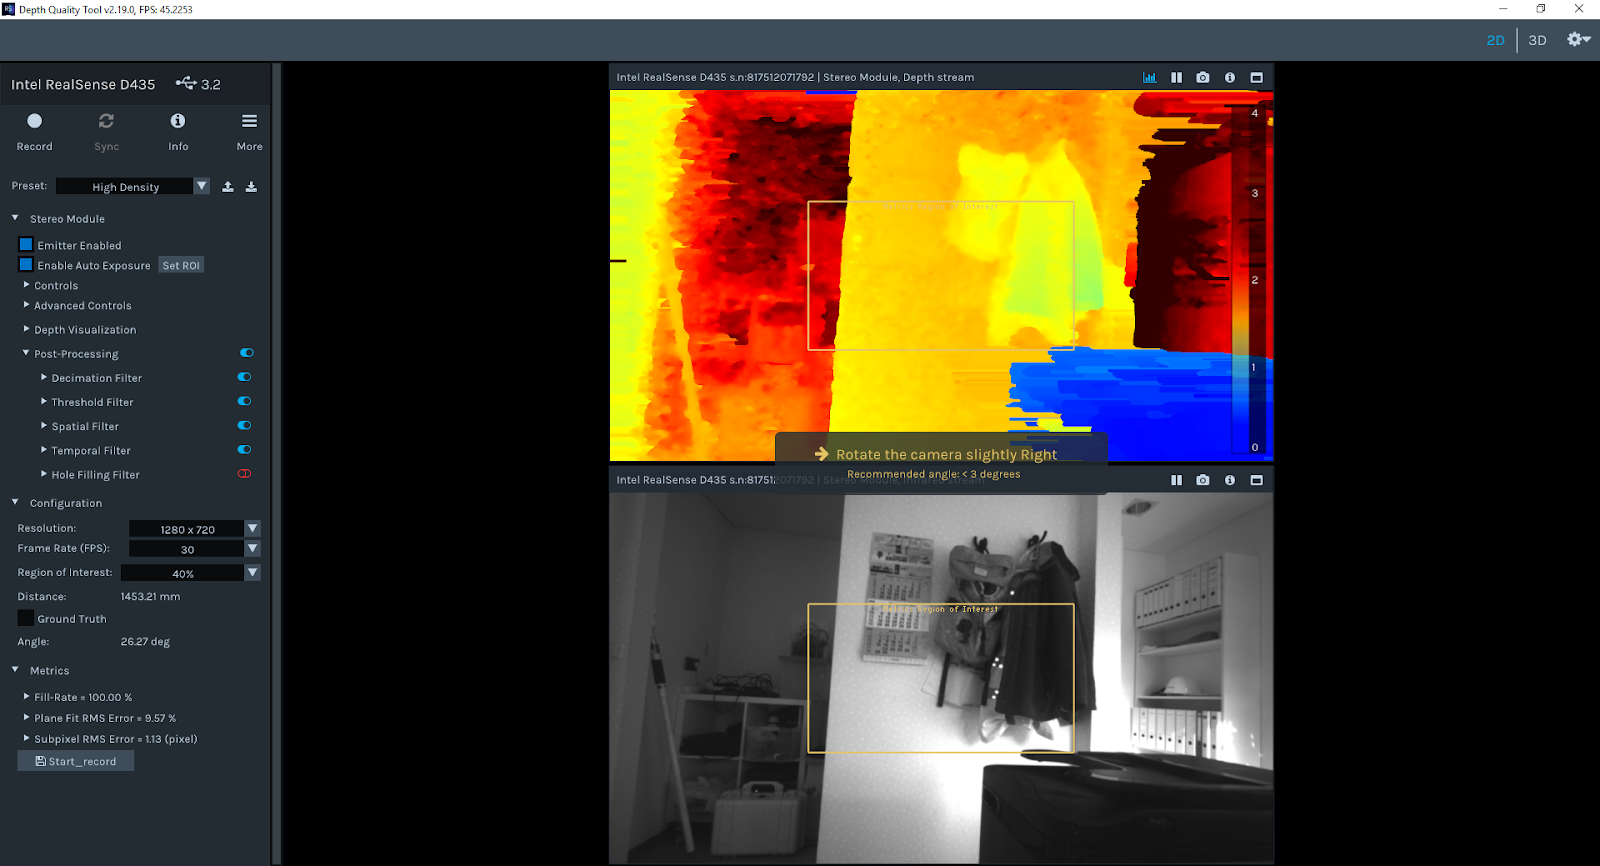
主要就是設定 preset還有後製post-processing
hole filling是我在這次主要會用到的功能


前後比較
除了這個 還有3D模式
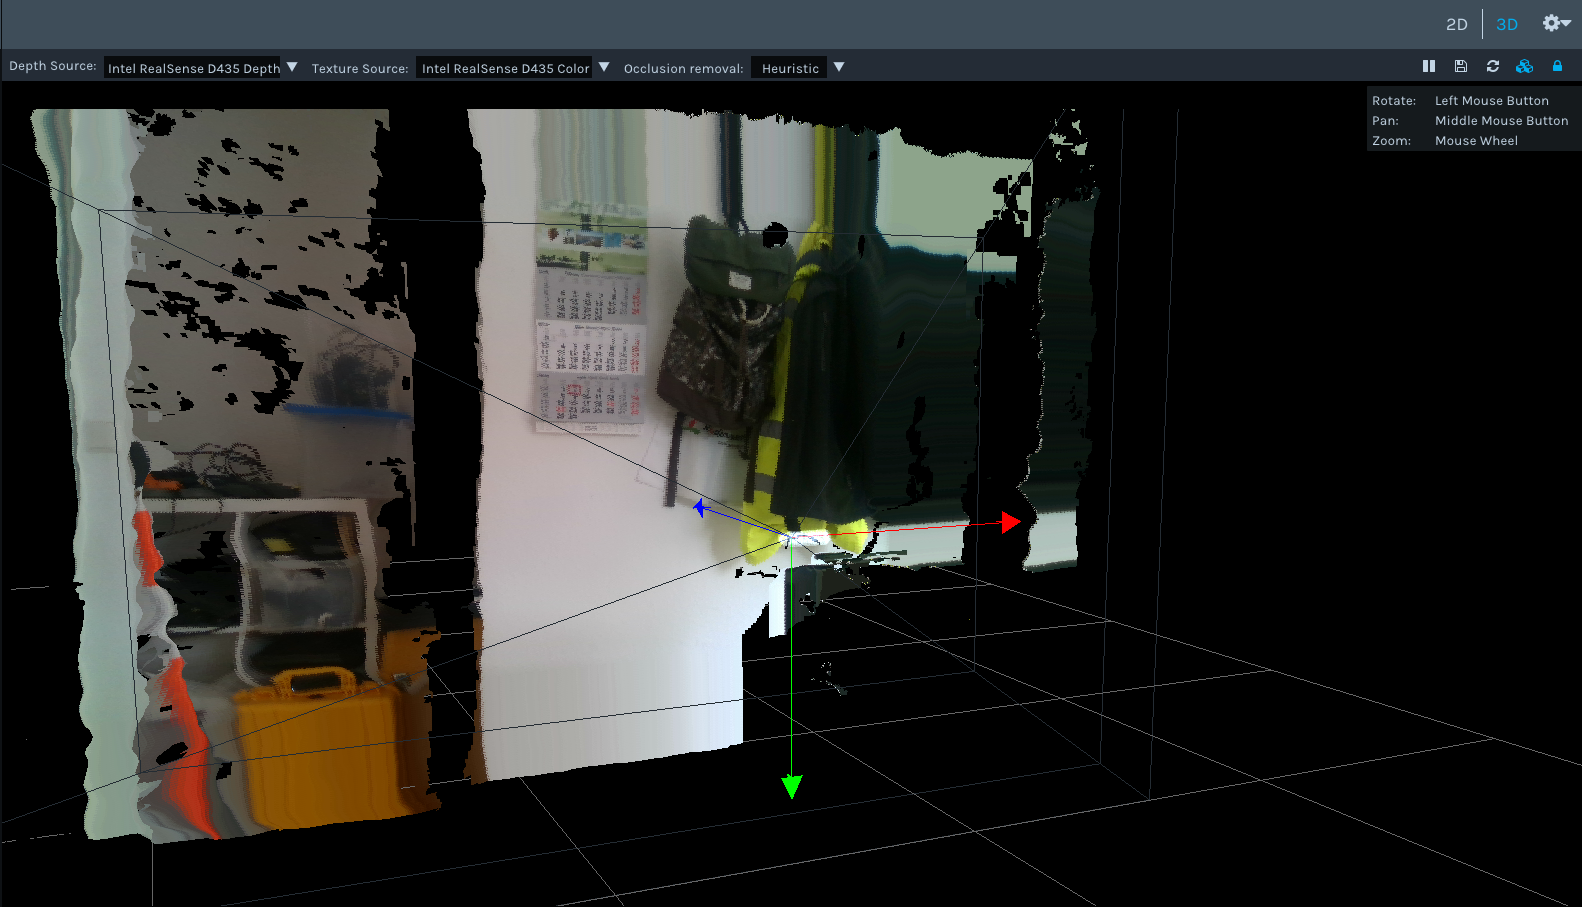
一個角度當然不夠,是在做pointcloud 3D模型的時候用的
然後depth viewer我用起來 就像是只用深度的部分
其他功能看起來都一樣 就是沒有RGB
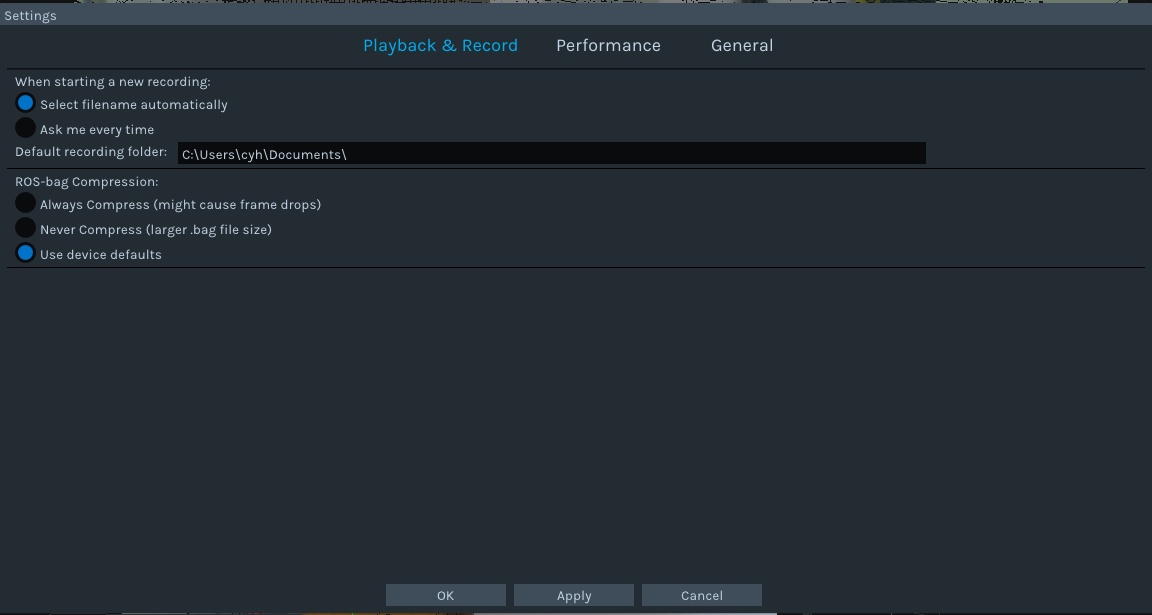
最後 錄製的成果可以選擇儲存在哪裡
————————————————————————————————————————
比較重要的幾個使用須知:
一定!一定一定!!!!!! 要使用USB3.0的接孔,才有足夠的頻寬可以把相機的影像傳到電腦裡面
相機本身就是一個感測器 除了鏡頭接收之外,還有小部分的硬體同步與修正,其他都回傳到電腦裡面做處理
因此,在線材的選用也必須要找usb typeC 然後也是3.1的USB線才可以用,也有一些因為太長而導致了資料傳輸失敗
最常出現的就是frame drop 當頻寬不足的時候 30fps錄下來的可能會有許多幀數遺失
還有一個我看到的問題,就是快速抽差
在使用的時候如果把線慢慢滑進去,可能就會偵測為USB2.0 所以務必一鼓作氣 直搗黃蓉
———————————————————————————————————————–
序就寫了開始的一些步驟 還沒開始到程式碼的部分
基本上安裝沒什麼問題,唯一在公司就是因為管理員權限鎖住,所以一路請主管過來輸入
直到韌體升級已經花了半天,從早上十點到下午兩點了
後來我問能不能調整權限,於是獲得了"新的"工作用電腦
ram 4G 2014年的lenovo電腦 沒有SSD
說這台完全沒有任何權限問題 你就拿去用吧!
